Stay posted with Seamingly Smitten's latest sewing patterns, tutorials, sales and more by following us on Facebook. When we reach 500 LIKES on Facebook there will be a GIVEAWAY! I will create and design one piece of clothing FOR ONE WINNER using one of our sewing patterns! LIKE us today by CLICKING HERE.
Fish Plushie
Do any of you sew plushies? I know there is a huge plushie craze going on right now, but if you know me, you know I wanted to try one that was simple. I like to sew things that are quick, but come out adorable! (I have 2 kids and my only time to sew is when they nap or are at school, so I have to make the most of my time - don't you?) Well I created a tutorial to share with you today to make a plushie. Even if it's your first try - you can do it! With some fabric and any embellishments you like, you can make a precious fish plushie in about 10 minutes. Make one or two today. They even float! My kids had a ball playing with them in the pool, scooping them up with nets, tossing them as far as they could and racing to see who could get it first - these were a hit!
TUTORIAL:
How to Sew a Fish Plushie
1. Gather materials:
fun fabric, a button for an eye, pins, scissors, a fish outline and poly-fill.
*You can find a fish outline like the one above by CLICKING HERE.
*I saved the image and inserted it into a document. Enlarged it and printed it. The bigger, the better, so it is easier for stuffing.
2. Cut out fish shape from your printed paper.
3. Lay your fabric right sides together. Trace your fish onto your fabric and cut out. You will have a fish facing the left and a fish facing to the right. These are your front and back pieces.
4. Embellish the front and back as you wish. Example: You can add a button nose, ric-rac stripes, ribbon strips coming off the back fin...etc. (Note: small buttons and embellishments could be a choking hazard for young children/babies. Make sure they are sewed securely or leave them off. Let the fabric be the focal point.)
5. Lay your fish pieces right sides together and pin.
6. Sew around the border of your fish using a 1/4 inch seam allowance. STOP SEWING 2 or 3 inches before your starting point to leave room for the filling. (I left the tail open.)
7. Turn inside out and press with an iron.
8. Fill your fish with poly-fill. I used the back of a pencil (the eraser) to push it through since my fingers couldn't reach all the way to the fish's head.
9. Turn in the edges and sew. You can also just sew as close to the edge of the hole as you can without turning it under.
10. You did it!
Here's the EASIEST way to sew a fish plushie...
1. Lay your fabric right sides together. Draw a large fish and cut it out. You will have a front and back piece for your fish.2. Sew on an eye and add any embellishment. (Buttons can be choking hazards for small children and babies. Sew it on securely or leave it off altogether.)
3. With the WRONG SIDES of your fish together (you are looking at the right side of your fabric), sew all the way around the fish using a 1/8 inch seam allowance but STOP SEWING 2 or 3 inches before your starting point.
4. Stuff with poly-fill and sew your hole closed.
*I have even washed and dried these fish and it did not fray since I sewed as close to the edge as I could.
5. Enjoy!!
My little boy LOVED playing with his fish in the pool! (The gold bead is a Mardi Gras bead in case you're wondering why he has on a necklace) :)
He threw it into the water about 20 times and would swim over to rescue it! It even FLOATED!
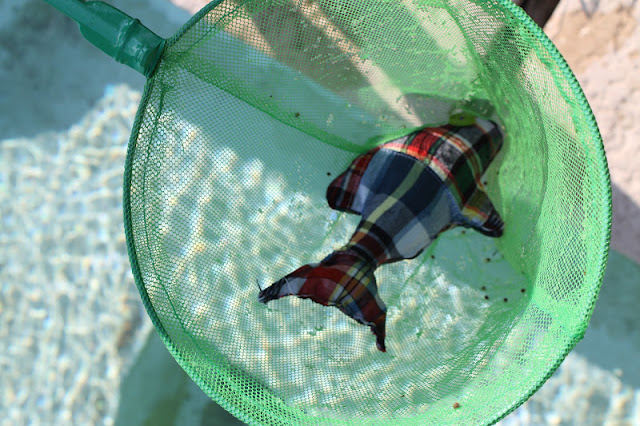
This fish plushie was the perfect fit for his fishing net, too!
What a great catch!
*After the kids got out the pool they squeezed out the water from their plushies and we tossed them into the dryer. I wondered if we would find a whole bunch of fluff in our dryer from the poly-fill, but they were both in one piece and the buttons were still in tact.
That means more fishing adventures tomorrow!
I hope you enjoy this tutorial!
Happy Sewing,
Jenny


3 comments:
Genius!!
Gorgeous! Can you do a car plushie for us please?
Jenny - This would be great with laminated fabric! The Crafty Shack had an adorable plaid similar to the one you used here!
Post a Comment