
Sewing Tutorial:
Girl's Dance Bag
There comes in a moment in almost every little girl's life where she wants to dance. She wants to put on her poofy pink tutu, those tiny ballet slippers and a leotard and TWIRL!
Well today is my little girl's first day as she calls it, "her very special dance class" and I needed to send her there in style. If your little dancer needs to carry her ballet shoes, tap shoes, tutu and leotard off to dance class she will definitely need a dance bag to do it. There are tons of them at the dance store of course, but it's more fun to make and it's THE MOST FUN when you make it with your special dancer!
1. Gather Materials:
half yard of cotton fabric, two yards of grosgrain ribbon, scissors, pins, sewing machine, thread, ruler and iron

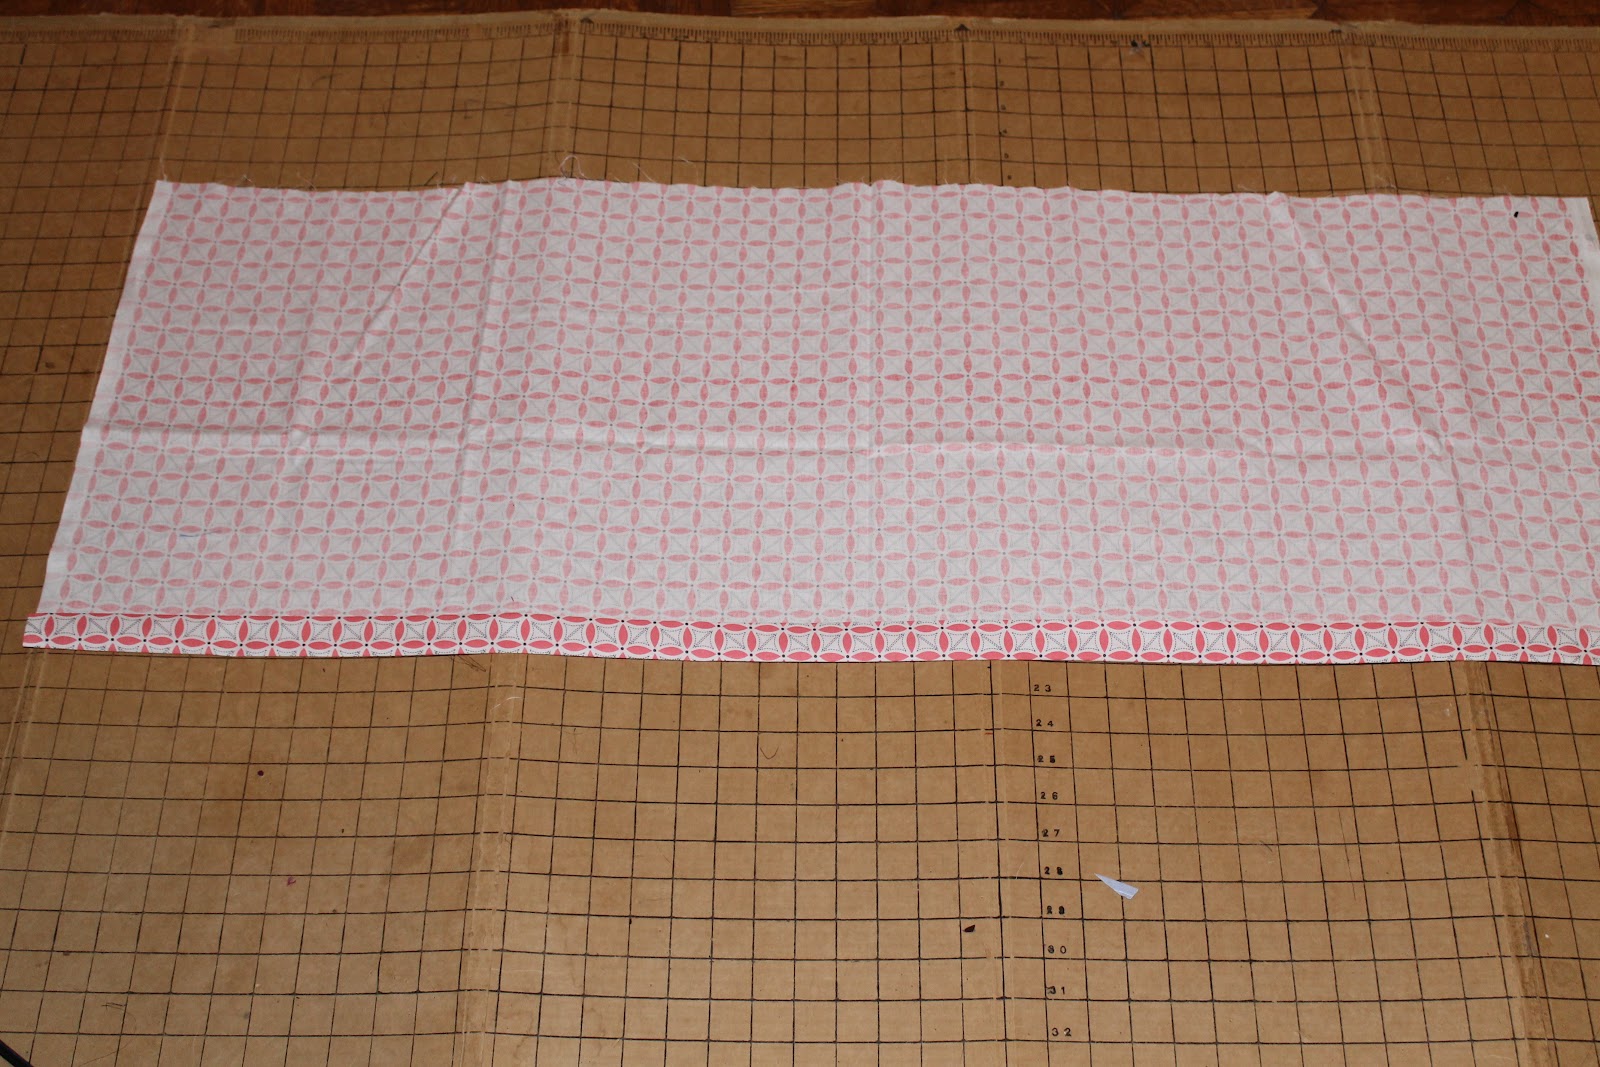
2. Cut a piece of fabric that is 18 inches long x 44 inches wide
3. Hem one long edge 2 inches. Fold up a one inch hem, press with an iron, fold up another one inch hem, press with an iron and pin along this edge. (This is the 44 inch edge)
4. Sew along your pinned edge. Remove pins as you sew. This will be your ribbon (drawstring) casing in a few steps.

5. Lay your fabric right sides together, matching up the short sides (the 18 inch long sides). Pin down this short side.
6. Put two pins at the bottom of your previously sewn hemmed edge. This will remind you to STOP SEWING whne you reach this point. You do NOT want to sew over this casing. It would close it.

7. Starting from the bottom of the short side that you just pinned, sew along the edge towards the top casing, but STOP when you reach the casing. Backstitch several times to reinforce this stopping point.
8. Turn right side out and press with an iron.

9. See the part of the casing that you did NOT SEW? There is an opening there and this is what you want. You did it correctly! This is where you will insert your ribbon to make it a drawstring.

10. Cut a piece of grosgrain ribbon that is 48 inches long. Insert a safety pin onto the end of it.

11. Insert your safety pin through one of these openings and feed your ribbon through until it comes out the other open end. You will start to gather your fabric over the ribbon as you do this.

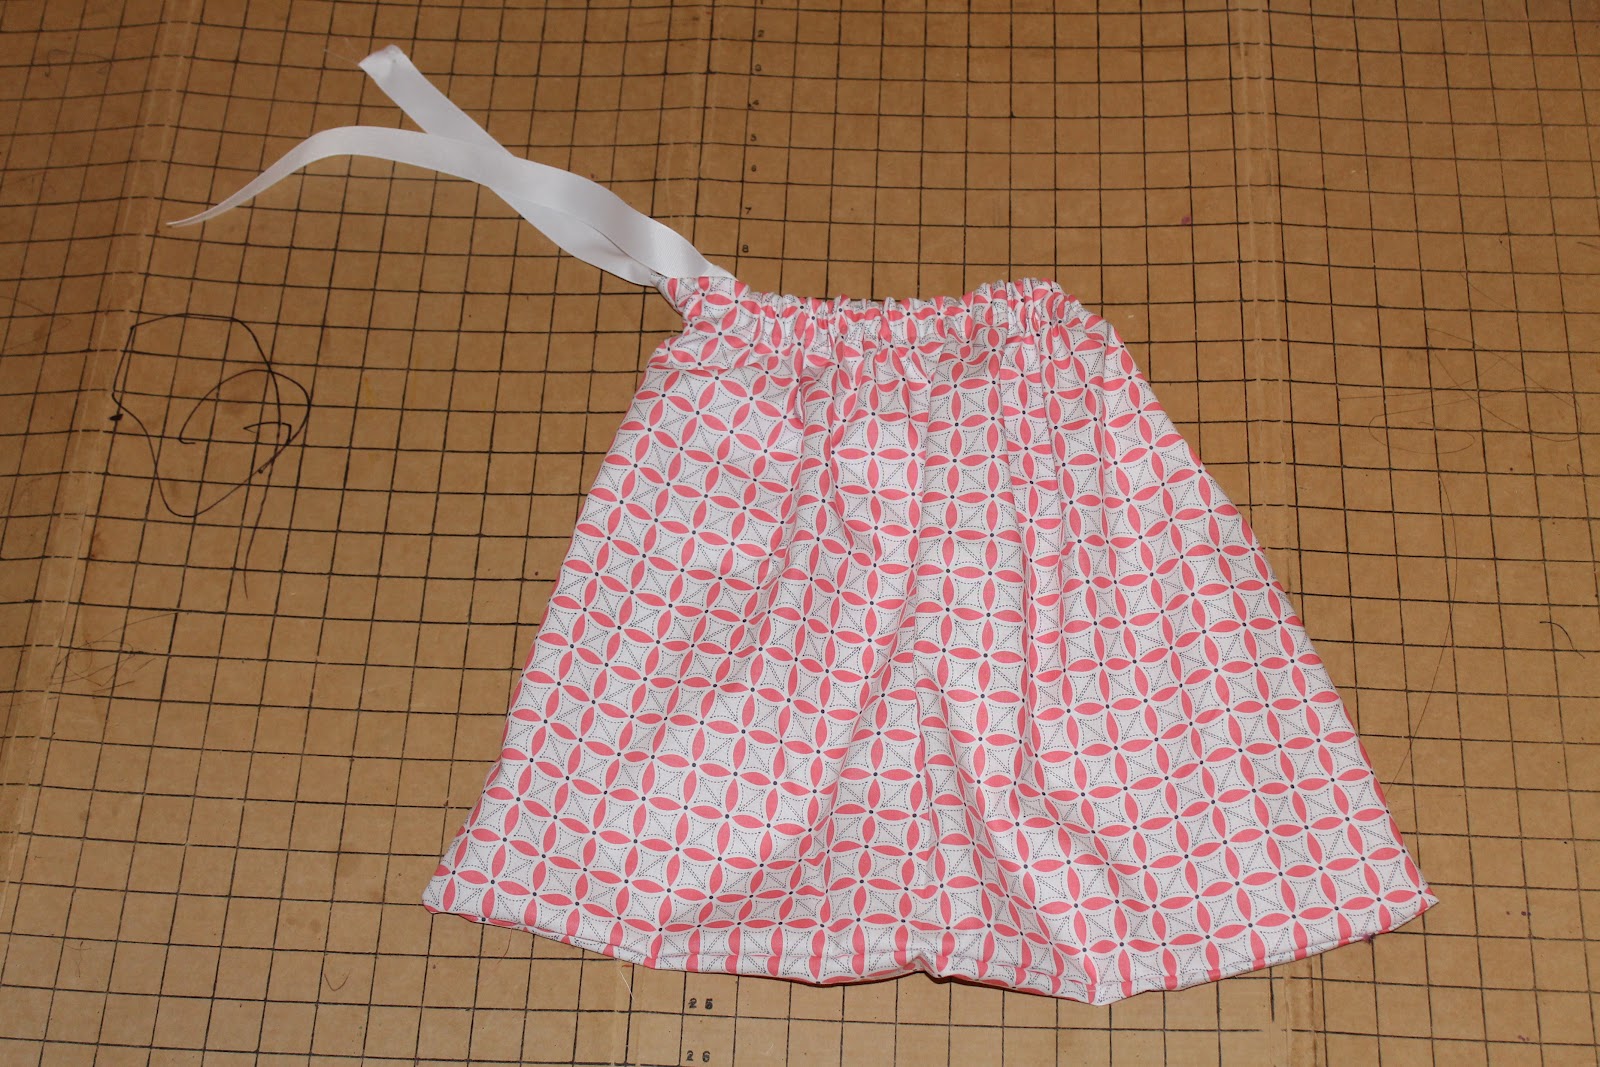

13. Tie your ribbons into a bow.

14. To make a handle cut a piece of ribbon 18 inches long and fold it in half.

15. Fold the joined raw edges over 1/2 an inch then another 1/2 an inch to enclose the raw ends. Pin the loop below the casing and sew down this short end to create a handle for the bag.

Toss in a tutu and some ballet shoes and let your little girl dance her heart out!

These tiny toes will forever melt my heart - with or without ballet shoes on them.

Happy Sewing!
I hope you and your little tiny dancer will have fun making one of these dancing bags together!
3 comments:
It's sew sweet of you to make your daughter's dancing bag instead of buying her one. I love the fabric. It's so girlish!!
This is absolutely beautiful,thanks for sharing.
Hi my loved one! I want to say that this article is amazing, nice written and include almost
all significant infos. I would like to peer more posts like this
.
Take a look at my homepage payday loans online lenders
Post a Comment