Some Summer Sewing
TUTORIAL: How to sew a bubble skirt
I just love how poofy this bubble skirt is. It is playful and fun - perfect for some playtime in the backyard, a trip to the park or even dressy enough to wear to a birthday party. Just add an appliqued or monogrammed shirt and she is ready to go!
Want to know how to sew a bubble skirt? Read on!
Worried about ironing? The way this bubble skirt is made actually has elastic that keeps it poofy. The two layers aren't just sitting on each other. Also, when you pick out your fabric, always give it the "squeeze test." I squeeze the fabric as hard as I can in my hand about 3 times. This will show you if it wrinkles easily. If I can see wrinkles after the "sqeeze test" I pass up that fabric and look for another that does not wrinkle easily. Scientific, right? :)
**All the fabrics on this page are 100% cotton apparel fabrics from Hobby Lobby. They wash and dry easily and I have not had to iron them.
TUTORIAL: How to sew a BUBBLE SKIRT
**This is for a size 2T
1. Gather materials: fabric, straight edge, iron, 3/8 inch elastic, fabric marker, pins, sewing machine, scissors and thread2. Cut a piece of fabric 19 inches long x 36 inches wide
3. Cut a piece of elastic that fits around your child's waist snugly. I cut 20 inches of elastic for the waist.
4. Cut a piece of elastic that fits around your child's thighs. I cut 21 inches of elastic for the thighs.
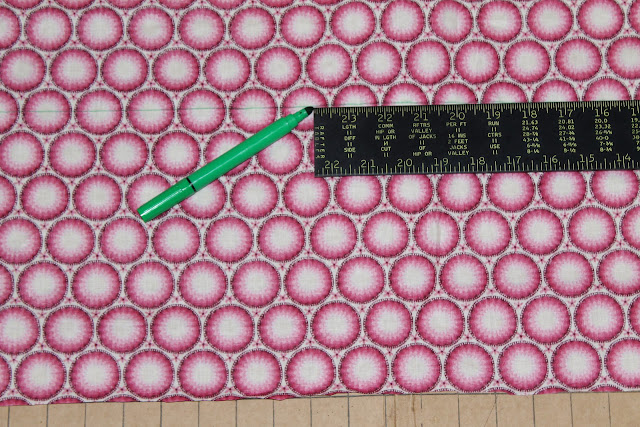
5. Lay your fabric open and right sides down. Measure up from the bottom 8 inches. Draw a horizontal line that is 8 inches below the bottom edge. (The bottom edge is 36 inches.) This is where we will sew the thigh elastic later.
6. Pin the left end of your elastic to the left edge of the drawn line. Repeat for the right end of your elastic and the middle of your elastic.
7. Sew your elastic down along the drawn line. Pull to extend the elastic as you sew. This is what gathers the fabric. You will pull it pretty firmly, so the fabric between two pins fits along that length.
It helps to use two hands while you do this. Your left hand grabs the fabric in the back and pulls it firmly. Your right hand holds the elastic that hasn't been sewn yet (in front of the presser foot) and pulls it, guiding it along the drawn line.
8. It should now look like this (above).
9. Turn your fabric over. The right side faces up.
10. Lay your fabric right sides together. Make the shorter edges match up and pin down the short side.
11. Sew down the pinned edge.
12. You will bring the bottom layer of the skirt up to meet the top edge of the skirt. Now you will just see the right side of the fabric. Pin along the top edge.
13. Serge or zig-zag around the top edge.
14. Fold down the top edge one inch and pin all around. This will be the elastic casing for the waist.
15. Sew all around the pinned edge using a 5/8 inch seam allowance. STOP SEWING 3 inches before your starting point.
16. Place a safety pin through one end of your waist elastic.
17. Insert elastic all the way around the skirt's waist.
18. Overlap the ends of the elastic half an inch.
19. Sew the ends together.
20. Sew closed the opening that was left in the elastic casing of the skirt.
21. Turn skirt inside out and YOU ARE DONE!


3 comments:
Thank you. I have been wanting to sew one for my granddaughter. How cute!
Thanks a bunch for the tutorial. I just pinned it so I can make one for my little girl!!
Do you have a bubble shorts pattern?
Post a Comment