
Free Christmas Dress tutorial

When Jamie from Scattered Thoughts of a Crafty Mom blog asked me to write up a free sewing tutorial for the holidays I went through all sorts of ideas in my head - tree skirt, stockings, pajamas, aprons...etc, but then it dawned on me that it HAD TO BE a Christmas dress!

Sweet picture with her big brother! Our little boy wore his first suit and I nearly cried :) How do our babies grow up so fast??
Are you loving the Scattered Thoughts of a Crafty Mom's Holiday Tour? There is an AMAZING blogger line-up and I was THRILLED that Jamie asked me to join the tour!!
Check out who is going to showcase a FREE Holiday Tutorial just for you!!

You will not want to miss these tutorials! You never know who will inspire YOU!!
On the last day of the holiday sewing tutorial tour (12/20), there will be a linky party open to all readers! You can link up any NEW holiday sewing projects that YOU have sewn this year!!
GIVEAWAY! Along with the link party, Scattered Thoughts of a Crafty Mom will also be hosting a giveaway for a brother 1034d serger that runs until December 20th!!
Wouldn't you like that under your Christmas tree??
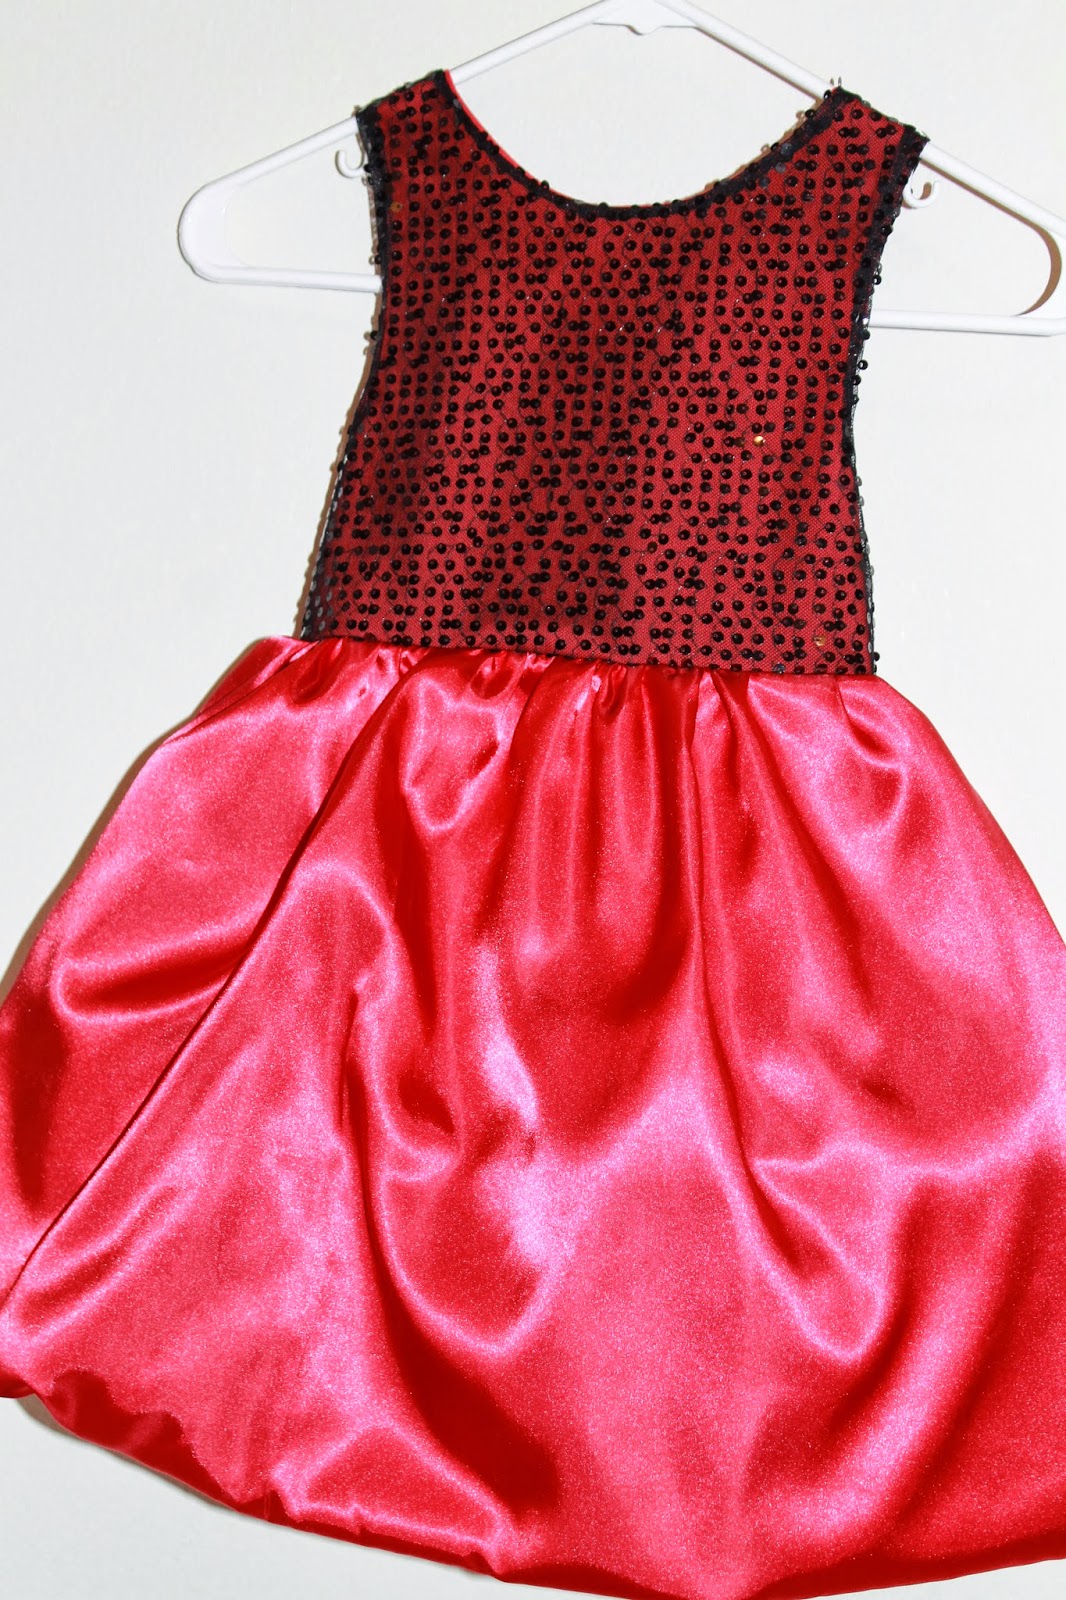
Free Christmas Dress tutorial
with FREE dress bodice pattern included for all sizes 6months - 10 years
*Tutorial shown is for size 5.
with FREE dress bodice pattern included for all sizes 6months - 10 years
*Tutorial shown is for size 5.
For some inspiration I checked out J.Crew party dresses and the website Elite Dresses to see their Holiday Party Dresses.
My style is pretty classic but I wanted to add some sequins this time for a little bling! Originally I wanted a red bodice with a black sequin skirt overlay over red satin but when my four year old saw the sequins she wanted that to be her "rock star dress" instead! I quickly grabbed the scissors out of her hand and ushered her out the room so she would be surprised!
Free Holiday Dress TUTORIAL


*This tutorial shows you how to make a size 5T with a final dress length of 23 inches. But I have included the bodice pattern for all sizes 6month - 10 years. Just adjust the length and widths as needed!
***You can always use a dress your child has in her closet to figure out the final length you need. Take the final length of the dress you need, subtract the length of the bodice pattern piece you printed in your size and add 1 inch to account for seam allowances. Then you will have the length needed for the skirt. Double the length since the skirt is folded in half and will not need a hem.
1. Gather materials (This is for a size 5T)
pattern bodice - you can download my own Seamingly Smitten's FREE dress bodice pattern HERE
1/2 yard black sequin fabric
1 yard red broadcloth (for sequin fabric lining) and the skirt underlayer
1 yard red satin
3 yards red tulle
two 1 inch buttons (or a cover button kit to make your own fabric covered buttons)
fabric marker
straight edge
scissors
pins

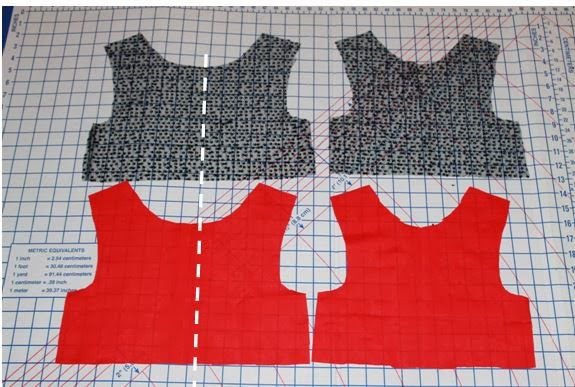
2. Cut a front bodice out of black sequins fabric and out of the red broadcloth with your pattern piece on the fold of each fabric.
3. Scoot your bodice piece one inch away from the fold. Cut out a back bodice out of the black sequins fabric and the red broadcloth with this wider bodice for the back bodice. (It will overlap and have a button closure.)

4. Cut a piece of red fabric for the skirt underlayer that is 44 inches wide x 15 inches long.

5. Cut a piece of red satin fabric that is 60 inches wide x 32 inches long. (We will fold this in half for the final dress so it will be 16 inches when folded.)

6. Hem the skirt underlayer 1/2 inch or serge the bottom of the skirt underlayer.
7. Lay out your tulle (72 inches wide x 3 yards in length). Fold it in half (making the bottom meet the top FOUR times so it is a wide, skinny rectangle) and pin along the width (the 72 inches).
Sew a straight stitch across the middle of your tulle rectangle to hold it all together.
8. Lay out your red broadcloth fabric (44 in wide x 15 in long) right side up.
Draw a horizontal line on your skirt underlayer 4 inches above the bottom edge. Pin the left and right end of the tulle to the skirt underlayer's left and right edges (4 inches up from the bottom). Pin the middle of the tulle to the middle of the skirt underlayer (4 inches up from the bottom).
Continue pinning and gathering your tulle's midpoints until it is evenly spaced.

11. Sew across the middle of your pinned tulle to secure using your widest ziz-zag stitch. (My machine was set to width 5). Remove pins as you sew.

12. Time to assemble your bodice. Lay your main fabric FRONT (black sequins fabric) right side up. Lay your main fabric BACK (black sequins fabric) right side down, matching up your shoulder seams and pin. The back pieces will overlap.
13. Repeat for your lining (the red broadcloth fabric).

14. Sew along your pinned shoulders ONLY using a 3/8 inch seam allowance. Remove pins as you sew. Trim threads.
16. Press seams open with an iron.
17. Lay your main sequins fabric bodice right side up. Lay your red lining fabric ON TOP of your main fabric with right sides together.
18. Pin starting at the left back bottom of the bodice, up and around the necklines and back down the right back bodice. Pin around each armhole.

19. Sew along your armholes, back sides and neckline only using a 3/8 inch seam allowance. Clip your fabric around the neckline curve using small scissors (do not do this if you used a serger). This will make it easier to turn right side out.

20. Turn bodice right side out. Press well with an iron to get a crisp neckline and back bodice.

21. Time to sew your side seams together. Lay your bodice right sides together so the front and back side seams line up. Starting on one side, ONLY PULL up the two red lining pieces and pin the two red lining pieces right sides together. Then pin the two main fabric pieces right sides together (all down the side seam). REPEAT for the other side seam.


22. Sew along your pinned edges using a 3/8 inch seam allowance. Fold your lining down and press with an iron. See how the inside edges are all hidden?

23. Lay your bodice down with the back of the bodice facing up. Overlap the right back side one inch over the left back side and pin along the overlap. Sew with a 1/4 inch seam allowance using a basting stitch AROUND the ENTIRE BOTTOM of your bodice (two layers at a time only) with these back pieces overlapping. You are NOT SEWING up and down the overlap because then it would be sewn shut. You are only sewing around the bottom circle of the bodice to keep the two layers together so we can add the dress bottom.

Lay your main skirt fabric right sides together, match up the long sides (the length) and pin down the entire length. Sew using a 3/8 inch seam allowance. No need to serge or zig-zag since this seam will be hidden.

25. Take the bottom of the fabric and make it meet the top all the way around. Match your raw edges and pin the two layers together all around the top of the dress skirt. Now you will see the right side facing you.

26. Run two parallel basting stitches around the entire skirt pinned edge (the waist) as close to the raw edge as you can get. (1/8 an inch and 1/4 an inch)
27. Lay the dress bodice right side up. Turn your skirt upside down and slip it around the bodice. Pull your basting stich to gather the skirt waist to fit around the bodice's raw edge. Pin the main fabric skirt RIGHT SIDES together to the bodice - make sure you match the skirt seam to the back bodice overlap.


Below: If you peek inside from the top, you will see the bodice.


28. Time to sew the underlayer together. Lay your skirt underlayer right sides together and pin down the short edge (the tulle layers will be touching). Sew along the pinned edge using a 3/8 inch seam allowance. Serge or zig-zag stitch the raw edges.

28. Lay the dress bodice right side out. Pin the skirt underlayer RIGHT SIDES together to the bodice.*You can do this by using a basting stitch to gather it then pin. OR I match my side seams of the bodice to the side seams of the skirt underlayer first and pin, then find the center of the skirt underlayer and the front and back centers of the bodice and pin. Then evenly distribute the fabric between the pins.

29. Sew around your pinned bodice using a 3/8 inch seam allowance. Remove pins as you sew.
30. Make two vertical buttonholes below the neckline of your left back bodice. One will start 1/2 inch below the neckline and the lower button will be 1 inch below the top buttonhole once sewn.
31. Sew on two buttons to finish it and be PROUD of what YOU MADE!!
Even though my little girl was in her best Christmas dress, it did not stop her from decorating cookies....

eating chocolate....

and jumping, climbing and sliding down the bounce houses at the party with Santa!

Wishing you a very blessed Christmas!!
I hope this tutorial helps you sew a sweet Christmas dress for your girl, too!
Stay tuned, because on the last day of the holiday sewing tutorial tour (12/20), there will be a
linky party open to all readers! You can link
up any NEW holiday sewing projects that YOU have sewn this year!!
AND...along with the link party, Scattered Thoughts of a Crafty Mom will also be hosting a giveaway for a brother 1034d serger!! Wouldn't you like that under your Christmas tree?? Enter on her blog!
In case you missed it, check out yesterday's tutorial by The Stitching Scientist where she made a baby Christmas dress!


Happy Sewing!!
Jenny
2 comments:
So adorable! I've been thinking about using some of that glitter fabric in a project too. Thanks for participating in the Holiday Sewing Blog Tour!
~Jamie
I love this dress, but I am looking at the armhole and it looks too long. Was it designed to be made that way?
Post a Comment