We hope you are having a Sew Crafty Christmas!!
Guest Poster #3
Are you enjoying ALL the AMAZING projects that you can sew??
We hope these inspire you! Wait until you see what
We hope these inspire you! Wait until you see what
Maridith from Strictly Homemade BLOG - click here has for you today!
Check out her blog to find fanstastic TUTORIALS
on projects such as these!
And, she made one of my Seamingly Smitten sewing patterns
The Ruffle Collar Cape for Babies/Girls for her 2 daughters. PRECIOUS!!
BUT, her craftiness didn't stop there!
She made a matching cape for her daughter's American Girl Doll!
Get the tutorial here.
Before you go off and browse her blog, check out what she has in store for you today!
Take it away, Maridith!
Hi Friends of Seamingly Smitten. I am so glad to be here to help you all get your sewing machines warmed up for the holidays!! I am Maridith from Strictly Homemade. I love all things homemade, but I am finding my niche in the blogging world by sharing upcycling ideas, thrifty ideas, and 18” doll patterns.
Did you know I have been here before? Jennifer liked me enough the first time when I guest posted about an upcycled cap for my baby girl that she asked me back. {SMILE} We also have another connection where I adapted one of her fabulous patterns to fit an 18” doll. Go check it out!
Today, I am going to share with you a boutique-y idea that is economical and easy. I think you will love it. A Temporary Holiday Shirt.

My daughter is very picky (saying it nicely) about how clothes fit her. When she finds clothes she likes I can’t just go messing with it and add a permanent applique on the front. She probably wouldn’t mind wearing a Christmas Tree in March, but I do. Then add to that how expensive it would be for me to buy each of my children (3 of them) a seasonal shirt it is just prohibited in this household. My solution is to make a Temporary Holiday Shirt for all of the seasons. The one I am going to show you to day is my 3rd!

Now for the Christmas Tree tutorial. The principle is the same for all three shirts. Apply your applique to felt the same color as your shirt and do a running stitch to keep it in place. Once you are done simply pull out the running stitch and your shirt can be plain or start over again!
To start this project I took off the turkey from the black shirt. Leaving me with a plain shirt.
I made my own pattern of a tree (any design would do). Then I cut 1” strips of material of knit I had upcycled from t-shirts.
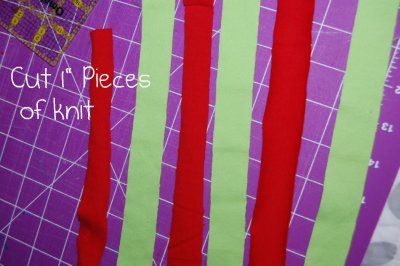
I sewed them in alternating colors with 1/8” seams.
I first sewed together 6 (3 of red and 3 of green) together, but it was not long enough but I had plenty of width.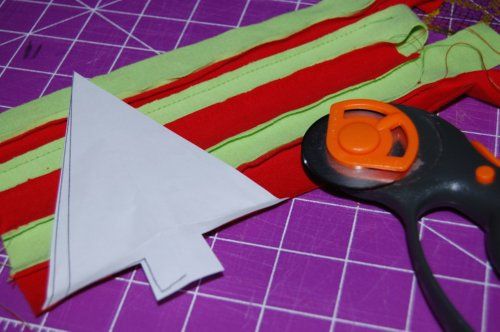

I cut my piece in half and then matched it back up underneath and sewed in place. Notice I am showing my seam allowances to give the tree a little more character!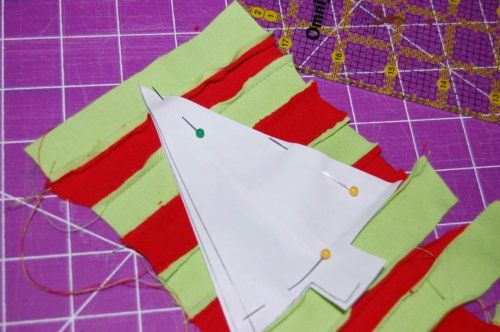

Iron your material then cut your pattern out of the material. Place on felt and sew around all edges.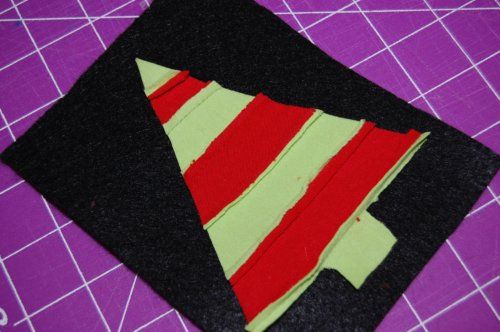

Trim the felt closely (but not too close)
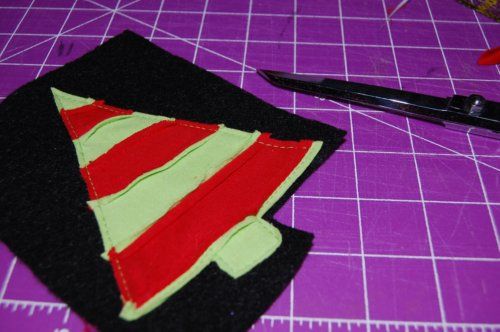
Place on shirt and do a running stitch to tack on.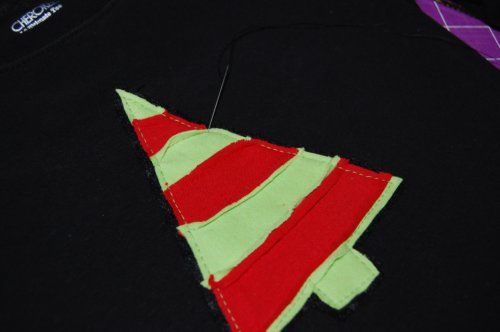

Add a ribbon on the top with a safety pin and you are done. Then you have a holiday shirt for a FRACTION of the cost and will still have a shirt to wear once the holidays are over!!

I applied the same technique on my youngest daughter’s shirt. I can’t help myself. I love coordinating clothes (especially when I don’t have to go to the store and it costs me $0.)

Thanks so much Maridith!!
Are you running to your child's closet yet to find a blank t-shirt?
Happy Sewing!
Check back later for the next GIVEAWAY from Jennifer.
You can find her at her PB3J BOUTIQUE - CLICK HERE!


You are too kind, Jennifer!! Thank you so much and it was fun guest posting for you today!! Cheers.
ReplyDeleteI love appliques, and I LOVE this idea!! Genuis!! I wish I had known this before I made all those turkey and pumpkin shirts. And reindeer...and Santa...
ReplyDeleteThanks Maridith and Jenny!
What a cute idea! Love it.
ReplyDeleteWow, what a great idea!! Definitely going to have to try this!
ReplyDeleteWhat a clever idea! Now my mind is reeling at all the possibilities. Thank you.
ReplyDelete