FREE Stuffed Animal Carrier Sewing Pattern and Tutorial
DIY Stuffed Animal Carrier / Backpack
*The pattern download link is below
DIY Stuffed Animal Carrier / Backpack
*The pattern download link is below
The other day my daughter wanted to spend some of her birthday and allowance money at Build-A-Bear so off we went to the mall! She quickly realized that there were too many things she wanted and not enough money for them of course :) She found the bear she wanted - Squirtle the Pokemon character - and then wanted a stuffed animal carrier for him. But, when she saw the price and looked at it, she said, "Mom, I think we should go home and make this!" OMGOSH did my heart explode! My little girl loves a project and this one was going to be so much fun to do together!
Catherine is almost 8 years old and has been "sewing" with me the past few years. She usually sits on my lap and I let her lift the presser foot, push the backstitch button and turn the hand wheel to lift the needle, then trim the threads. Well, this time it was different! My big girl sat at the machine all by herself and I stood next to her, in awe of her moving the fabric as she sewed, knowing exactly when to lift and lower the presser foot and watching her little hands trim the thread. Just in awe. It was a beautiful and proud moment and I love watching her grow up!
Tutorial below...
I could watch her create all day long. That persistent look, those creative ideas that never stop - she is full of so much joy daily and I love her heart!
Trying hard to keep the fabric straight.
Stuffed Animal Carrier Sewing Tutorial
Print the FREE stuffed animal carrier pattern pieces HERE.
Materials: 1/2 of a yard of cotton fabric; 1/2 yard of fusible interfacing; 36 inches of bias tape (for straps or 1/8 of a yard of fabric for the straps)
Make sure your 1 inch square measures 1 inch. Do not overlap pages when you lay out the pattern pieces. Cut out pattern pieces.
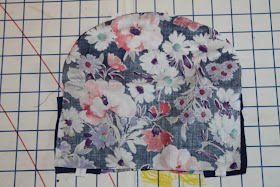
1. Cut 2 carrier pieces in the fabric you are using.
2. Cut 1 stuffed animal holder pattern piece. Trace the foot arch but do not cut out the foot arch yet.
3. Cut 2 straps 18 inches long (we used bias tape) OR cut out two straps 2 inches by 18 inches. Fold the straps in half so they are 1 inch by 18 inches, sew along the long side and turn right side out. Press with iron.
4. Iron on interfacing on the back (wrong side) of one carrier piece.
5. Iron on the interfacing on the back (wrong side) of the stuffed animal holder.
6. Fold down a 1 inch hem along the top edge of the animal holder. Pin and sew.
7. Cut out 2 arches for the stuffed animal's feet. Zig-zag stitch the arcs to reduce fraying.
7. Lay one carrier piece right side up. Lay the stuffed animal holder right side up and centered along the bottom edge. Gather it and pin. You need this to be roomy because of the depth of the stuffed animal - they are not flat like a piece of paper :)
8. Lay the straps 3 inches apart and centered along the top and 2 inches in from the left and right bottom edge. Pin.
9. Place the other carrier piece right sides together. Pin all around.
10. Sew all the way around but STOP SEWING 4 inches before your starting point. Turn right side out through the hole. Sew the hole closed.
You're done!!


