Pages

Wednesday, February 29, 2012

Tutorial: SHIRRING...How to Shir Fabric


Sewing Lesson: How to Shir Fabric

After seeing this Women's Shirred Sundress pattern many sewers have been asking me how to shir fabric. So many sewers mentioned when they looked at something shirred they were intimidated by it. Well I'm here to say, "Don't be!" After reading this tutorial I hope you will TRY IT! Once you try it, you will see that elastic thread is nothing to be afraid of and actually quite fun! It can take a plain piece of fabric and gather it beautifully and then when you see that pre-shirred material in fabric stores selling for 19.99 a yard you will look at it and think to yourself, "I can do that myself!" Don't you love that sewing confidence when it follows you around the craft store?

Alright, Ladies, you asked for it and I hope you like it! 
 Tutorial:
How to Shir Fabric

1. Gather Supplies:
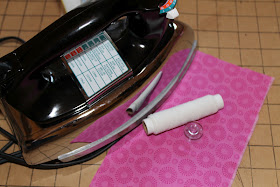
*one spool of elastic thread
*an empty bobbin
* a 4 inch long x 8 inch wide piece of fabric for practicing
*an iron
*a spray water bottle (or you can just fill a bowl with some water)
*sewing machine

**Suggested Fabric: Ttry it on whatever you have in your stash...apparel cotton, quilter's cotton, jersey (old t-shirt), rayon...etc....this is just practice...so there's no pressure for a finished project. (But just wait until you see shirring in action and your creative mind will start spinning with cute clothing ideas!)

**Below: This is a close-up of elastic thread for shirring. It comes on a cardboard spool and is found next to the elastic in the fabric store. (It is less than $3.00 if you are curious.)


2. Take your elastic thread and hand wind your bobbin. You want to wind it with some tension. If your thread is too loose it won't work. You want it pretty snug on there, but not so snug that you are stretching the elastic until it breaks as you wind it. Just firmly wrap it around. It will take about a minute or a minute and a half to hand wind it. (You might get bored, but go with it!)
*There is no easy way around this, the machine cannot do it for you.
Below: Start winding the elastic thread firmly

Below: Wound and ready! Hold the end of the thread when you are done.
If you drop it, it unwinds pretty quickly and you will have to start over.

 3. Insert your elastic wound bobbin into your sewing machine and thread your machine as usual. Use the same old thread you normally sew with and a needle size that matches your fabric choice.

4.. Lay your fabric RIGHT SIDE UP...Let me say that again because I know it sounds SO WEIRD! Lay your fabric RIGHT SIDE UP. Want to know why? The elastic thread is in your bobbin, which makes the stitches under the fabric. You want the elastic to be on the underneath side of your fabric/the wrong side of your fabric (it isn't pretty, but it helps make something pretty!)

*If you accidentally start sewing with your fabric wrong side up, just rip out your stitches or cut off that part and start again. Don't let one or two or ten mistakes stop you from practicing and learning this!

Below: Keep your fabric right side up.

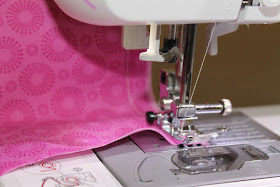
5. Start sewing along the width of your fabric (fabric is right side up) using a 5/8 inch seam allowance and backstitch at the beginning, then continue sewing until you reach the end of your fabric.
** Do NOT backstitch at the end of your fabric.
*** HINTS: Use a straight stitch and regular stitch tension. Do not change any settings on your machine.

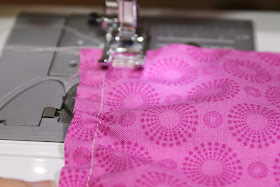
Below: Sew to the end of the fabric in a straight line.

6. When you reach the end, lift your presser foot and raise your needle so it is not touching your fabric. Turn your fabric around 180 degrees, line up the presser foot so it is parallel to the previously sewn line, lower your presser foot and start sewing again until you reach the other side.

**Below: When you turn it around you may see this elastic thread piece under your fabric. Pull it. It sometimes gets stuck in your first few stitches. Just pull until it releases. You aren't messing up any of the stitches, you are just moving it out of the way so it doesn't get sewn over when you turn your fabric around.

Below: Fabric is turned and the presser foot is lined up paralled to the previously sewn line.
*The fabric may start to gather a little, that's fine...keep going.

Below: Try to keep your lines parallel.


7. Sew again until you reach the other end. Then lift the presser foot and needle, turn your fabric 180 degrees, line up the presser foot, lower it and sew another line.
Continue this process until you have sewn 6 lines. Backstitch at the end.
Below: Done!

Below: This is what the wrong side of your fabric looks like before you iron it.

8. Now the fun part! Lay your fabric right side up on your ironing board.

9. Spray the shirred part lightly with water from your spray water bottle. (If you do not have one, just wet your hands and pat the fabric until it is damp.)

10. Using an iron setting for the fabric you are using PRESS DOWN with your iron onto one part of the shirred lines for 10-12 seconds. YOU WILL hear a SIZZLE :) That's OKAY! It means you're doing it correctly! YAY!  *Do not move your iron back and forth like you do when you iron a shirt.

Below: Sizzle, Sizzle!

11. Lift your iron and move it over so you can press down the next part of the shirred lines. You will continue until the whole piece of fabric has been dampened and pressed with an iron (to sizzle it) :).

Below: When you lift your iron you will see it starting to gather. Woohoo! It really does work!

Below: Press the next spot with an iron. Repeat until all shirred lines are done.

12. Take off your iron one last time and look at your beautiful piece of shirred fabric!!


13. Now try it again and again until you try it on a sewing project! Think: skirt waistbands, bubble tops, sundresses, dresses and much more!
**When you practice, try it on different fabrics to see which shir (shrink and gather) more than others. I've found that rayon and cotton shir the most. Linen is pretty heavy so it will shir the least.

Below: My sister, Laurie, is wearing the first shirred dress I made about 2 years ago.

Below: Women's Shirred Sundress sewing pattern


Let me know if you try it!! Email me a picture of your shirred lines or shirred project.
I wish you all HAPPY SEWING!

*I would love to hear what you think. Did this help? Will you try it? I hope so!!
*Let me know if you have any questions.
 Any more topics you would like tutorials on, ladies?

Happy Sewing!
Jenny
Owner and Designer/ Seamingly Smitten sewing patterns
Like us on Facebook to find out about new pattern releases and FREE sewing tutorials.

Monday, February 27, 2012

New Sewing Pattern for Women! Available now!


NEW!! Women's Shirred Sundress
sewing pattern
Now Available!

Looking for a dress to sew for yourself?
Want to learn how to sew something chic and trendy AND learn a new sewing technique?
Try this shirred sundress TODAY!
Make one (or two or three of course!) just in time for Spring in any color you can imagine! Lightweight, comfortable, casual and chic - sew something trendy today just for YOURSELF!

Happy Sewing!

I'm at Sugar Bee Crafts Today!

We are hosting a HUGE GIVEAWAY on Sugar Bee Crafts!
Hop on over to Mandy's blog and see what we are
 GIVING AWAY!!


You might WIN many of these PDF Sewing Patterns for BEGINNERS - advanced!


Follow us on Facebook to find out about new releases, sales and sewing tutorials!

LOVE TO SEW? We have original sewing patterns - modern and trendy - for you and your little girls! Want to see what we have in our Etsy Shop?

Happy Sewing!
Jenny
Owner and Designer, Seamingly Smitten sewing patterns

Friday, February 24, 2012

Women's Ruffled Tunic sewing pattern

Sewing - All in a Day's Work!

I have a customer creation I would love to show you! Louisa bought The Women's Ruffled Tunic sewing pattern yesterday and a few minutes ago she sent me pictures of it!

Louisa wrote, "This was a superbly easy pattern and I whipped this tunic up this morning from the pattern I got from you yesterday. Awesome! Easy goodness!...Now I'm going to lengthen the pattern and make some beach dresses/pullovers and maybe even another top with a ruffle bottom. Your pattern got my mind a little creative again...thanks!"


Louisa, this made my day!! I LOVE sewing and I LOVE helping women make things for themselves that they can actually wear!

Creativity knows no bounds!

Wednesday, February 22, 2012

Women's Shirred Sundress

Linen.
I love linen.

 It reminds me of summertime, sunscreen, floppy hats, listening to Zac Brown Band by the pool, Tommy Bahama clothes, laying on a hammock, breezy morning beach walks in Destin....so many memories. I've been so inspired by Pinterest lately and some drop waist dresses that I have been seeing that I made this shirred drop waisted sundress. And if you really like it...next week it will be in our pattern shop. I think I'm going to make another in a paisley rayon next, then in an eggplant linen with ribbon trim and straps, then in an orange linen with a large wooden bead with halter straps....and then...well, someone will have to stop me!


Want to learn to shir? Be on the lookout for a tutorial on shirring - coming soon!
Once you learn to shir, will be a shirring rock star all summer long!

To stay posted on new PDF sewing pattern releases follow us on Facebook.
To see our other PDF sewing patterns CLICK HERE.

Happy Sewing!!
Seamingly Smitten

Monday, February 20, 2012

TUTORIAL: Bubble Halter Top


I made this bubble top for my little girl the other day out of some polk-a-dots, gingham and chicken fabric. The chicken fabric just makes me smile! It's so easy to make a bubble top!

You measure your child's chest and multiply that number by 1.5  My little girl's chest measurement is 20. So 20 x 1.5 = 30 inches around. Then figure out how long you want it. I wanted hers 14 inches long and then I added 2 inches for hems total.

I cut one rectangle 16 in long x 30 in wide to make this 2T bubble top.

Bubble Top Tutorial:

1. Cut out rectangle 16 inches long x 30 inches wide.
2. Iron your top and bottom hems (fold over half an inch, iron, fold another half an inch, iron and pin).
3. Sew along the pinned edges at the top and bottom.
4. Cut 2 strips of 3/8 inch elastic. I cut the top / chest elastic to 18 inches. I cut the lower / waist elastic to 15 inches. Insert your 3/8 inch elastic through each casing at the top and bottom.
5. Sew down all 4 elastic ends to the fabric edges at the ends of each casing (top and bottom).
6. Lay rectangle right sides together, matching the shorter sides and pin (pin down the length).
7. Sew down the pinned edge. Serge or zig-zag raw edges. Trim threads.
8. Make 2 straps 26 inches long each and attach! (I put a buttonhole front-center to put the straps through to tie; but this can also be worn backwards and have it tie in the back.)
9. Try it on your little girl!

**HINTS:
1.You can also use ribbon for the straps. Each strap should be about 26 inches long. Fray check the ends. Sew them on front/center to tie in the back or you can spread them out according to your child's size and tie them in the back around the neck.
2. You could also use bias tape as the straps. You will need 2 pieces of bias tape 26 inches long each. Sew down the long ends of each strip of bias tape to keep the bias tape folded/closed. Hem the ends by folding over twice and sewing across the short ends to enclose the raw edges. Attach straps as desired.
3. If you want a coordinating panel on the bottom of your bubble top, the length of your panel piece and your main piece will still be the same final length as in step 1. Meaning if your child's final bubble top length is 14 inches, and you add 2inches for hems your total length of your two fabrics will be 16 inches. 
So I would cut my main fabric piece: 11 in long x 30 in wide
I would cut my coordinating bottom panel: 5 in long x 30 in wide

11 + 5 = 16 inches TOTAL LENGTH
Sew those two panels right sides together, press open with an iron and begin sewing your bubble just as in step 2.


Let your little girlie prance around all day long in her super-cute, handmade bubble top and SMILE everytime you see her wearing it!
Happy Sewing!


Like us on Facebook to find out about pattern sales, blog posts and FREE sewing tutorials.

Saturday, February 18, 2012

sewing pattern SALE 2 for $8 dollars


LOVE to sew? Can't decide which pattern to try?

SALE* SALE* SALE!

Now's your chance to get ANY 2 sewing patterns for $8.00!  

Seamingly Smitten sewing patterns are easy enough for beginners! Confused by a store-bought pattern? A PDF pattern will show you pictures and guide you step-by-step to make a piece of clothing! Even if you have NEVER used a pattern before, you CAN sew with these patterns!

*These PDF patterns have:
-step-by-step directions
-use beginner sewer language
-easy to follow AND understand
-plenty of clear, quality photos
-can be printed over and over
-many sizes included in each pattern (see each pattern for details)

And if you ever have a sewing question, I am only an email away! My help is always available via email, even if you think it is a basic question...ask it!

*Become Seamingly Smitten TODAY!